Etsy Photography & Listings
How to Take Product Photos for Etsy on a Phone
By Jess Harrington, Etsy Shop Success Coach · Updated 2026-03-26
Learning how to take product photos for Etsy on a phone is the highest-leverage skill an Etsy seller can develop. Great photos directly drive click-through rates, conversion, and repeat buyers — and with a modern smartphone, natural light, and a few simple techniques, you can create listing images that compete with professional studio shots.
By Jess Harrington, Etsy Shop Success Coach | Last updated: March 26, 2026
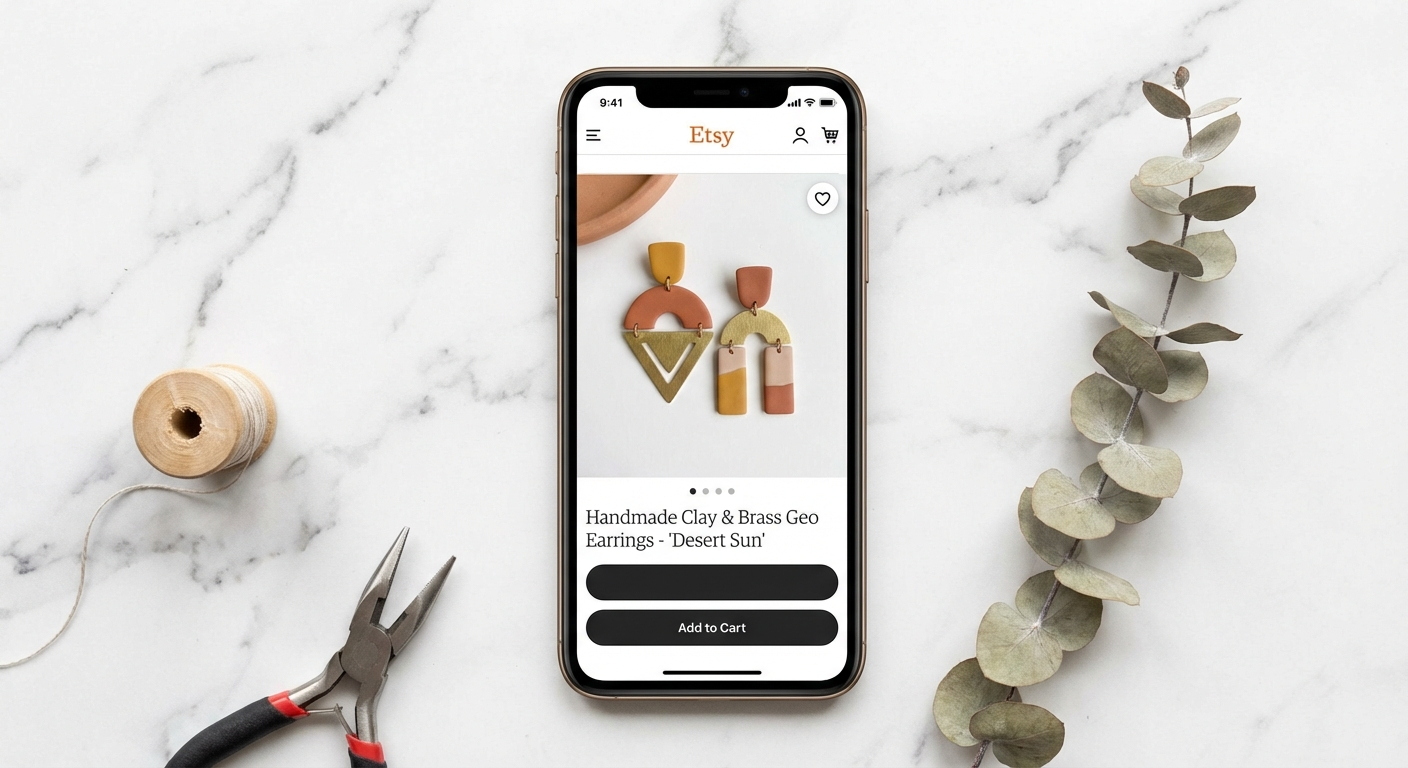
I have helped over 400 Etsy sellers grow their shops, and the single most common bottleneck I see is weak listing photos. Sellers pour hours into making beautiful products, then photograph them under a kitchen light with a cluttered background and wonder why their click-through rate is low. Here is the truth: on Etsy, your photo is your product until the buyer receives the package.
The great news is that you do not need a DSLR camera, a photography degree, or a professional studio. Today's smartphone cameras — particularly in the iPhone 15 and Samsung Galaxy S24 families — shoot images that are indistinguishable from professional product photography when used correctly. The difference between average and outstanding Etsy photos comes down to lighting, composition, editing, and a few pieces of inexpensive kit.
This guide walks you through every stage of the process, from setting up your shooting space to editing your final images, with specific recommendations tailored to Etsy's image requirements and search algorithm.
 Hero visual for this section
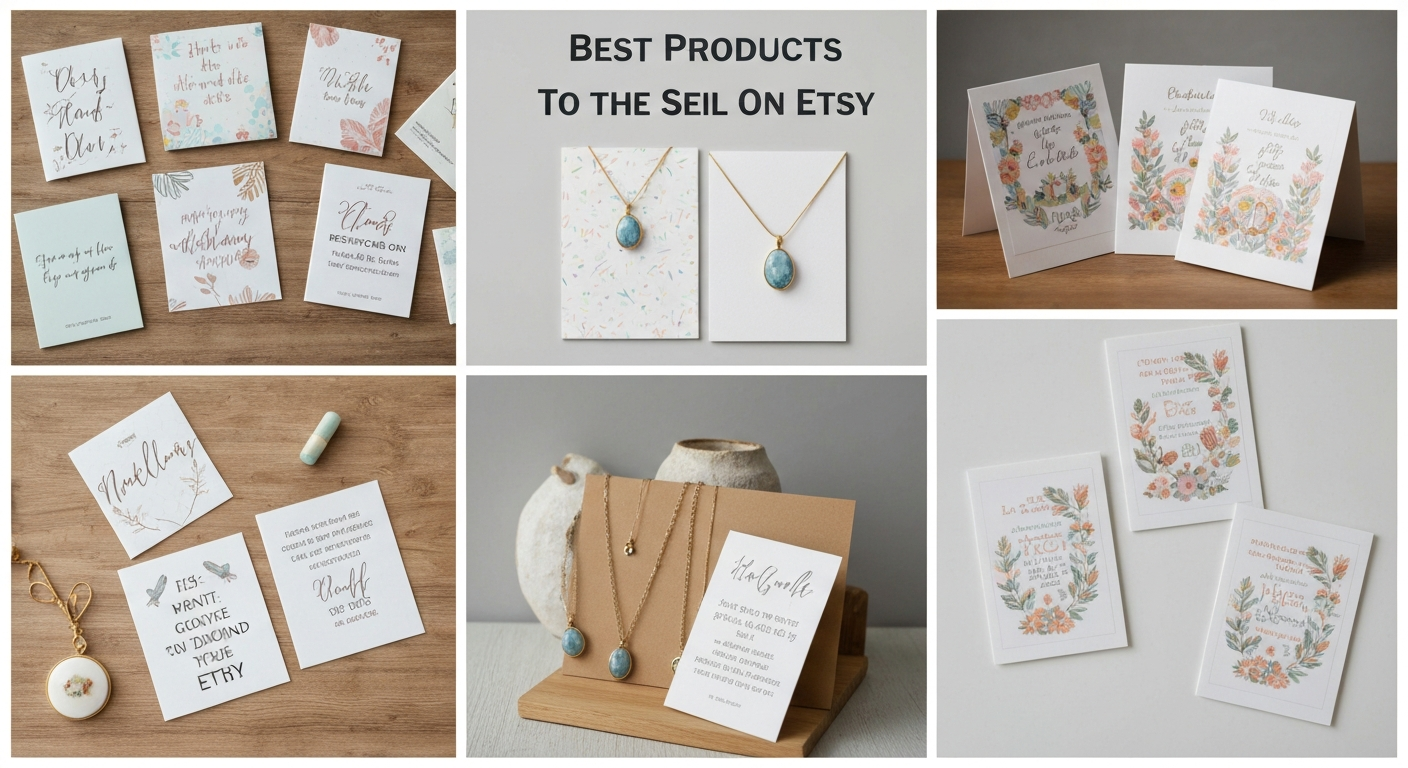
Table of Contents
 Comparison visual for Table of Contents
- Understanding Etsy's Photo Requirements
- Setting Up Your Shooting Space
- Mastering Natural Light for Product Photography
- Backgrounds That Convert: What Works on Etsy
- Phone Camera Settings to Use Every Time
- The 10 Shot Types Every Etsy Listing Needs
- Styling and Props: Less Is More
- Editing Your Photos on Your Phone
- Best Phone Photography Accessories for Etsy Sellers
- Common Mistakes and How to Fix Them
- Batch Shooting: Get a Month of Photos Done in One Afternoon
- Frequently Asked Questions
- Sources & Methodology
Understanding Etsy's Photo Requirements
 Infographic visual for Understanding Etsy's Photo Requirements
Before picking up your phone, understand what Etsy's platform actually needs from your images. Getting this right from the start saves you from costly reshoots.
Technical specifications:
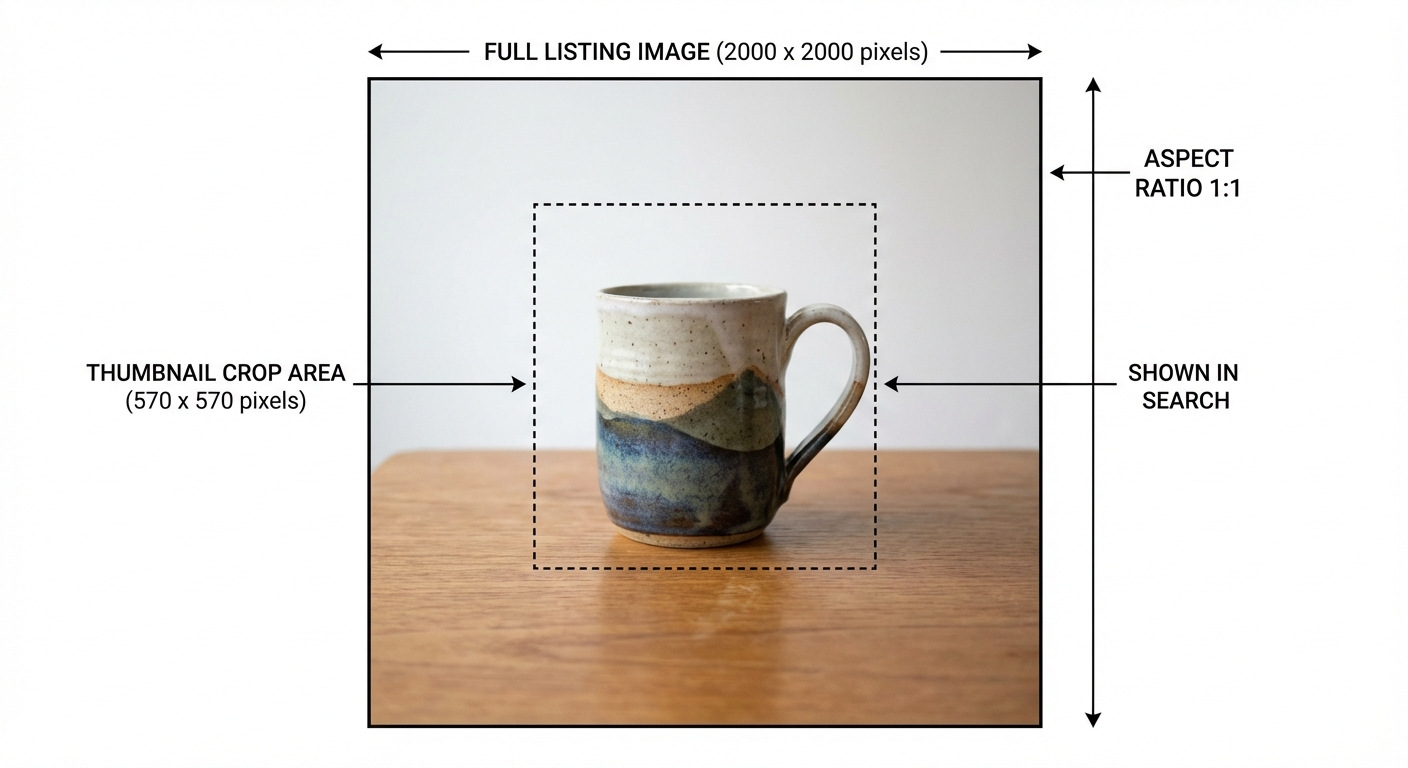
- Minimum size: 2,000 pixels on the shortest side
- Recommended: 2,700 x 2,025 pixels (4:3 ratio)
- Maximum file size: 20 MB per image
- Accepted formats: JPG, PNG, GIF (static images strongly preferred)
- Available slots: 10 photos per listing (use all of them)
Thumbnail behaviour: Etsy crops your first image to a square in search results on mobile and to a 4:3 rectangle on desktop. The most important subject matter in your hero photo should sit in the centre of the frame so it survives both crops.
Search and algorithm impact: Etsy's search algorithm considers listing quality score, which is partly driven by engagement metrics. High-quality photos that generate clicks signal quality to the algorithm — better photos produce a compounding SEO benefit over time.
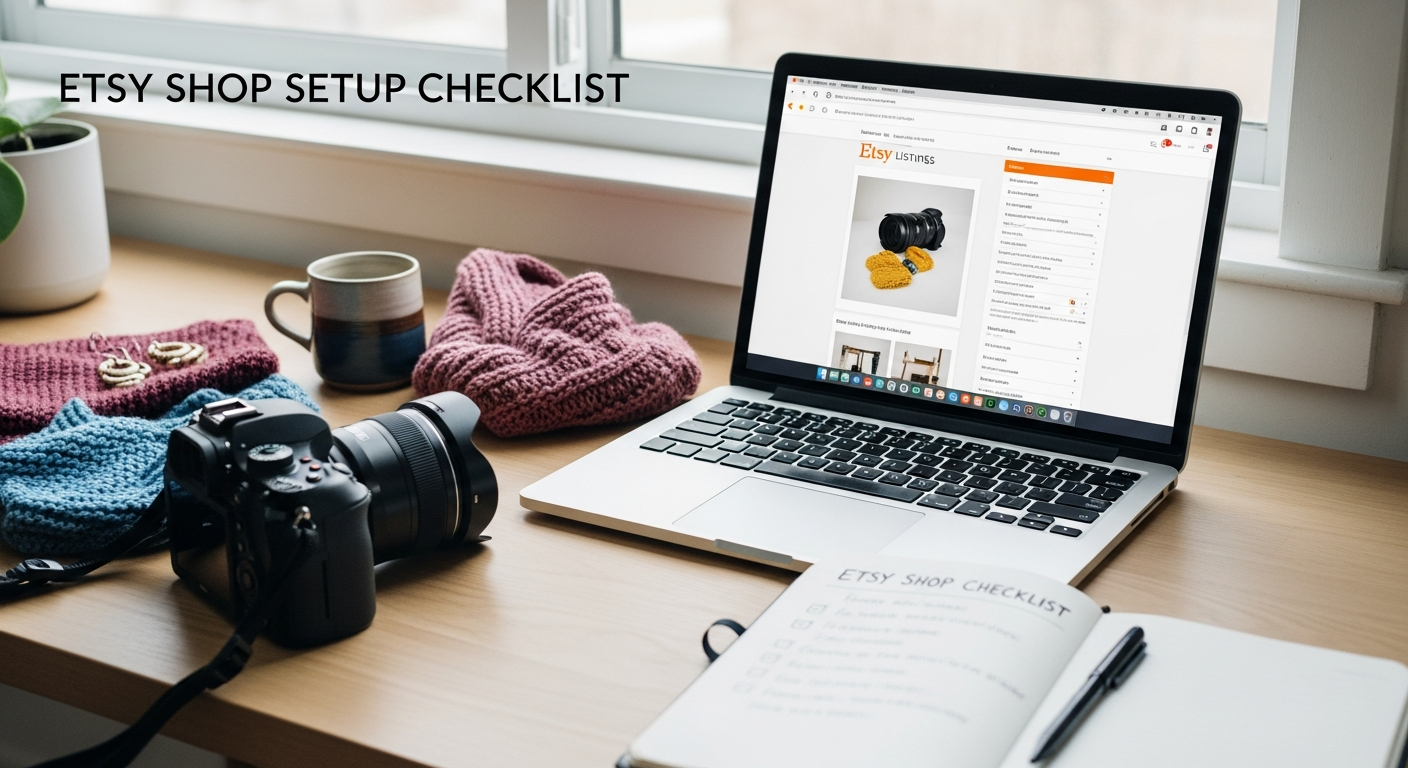
For a broader overview of how to optimise your shop from the ground up, our guide on Etsy shop setup for beginners is a great starting point before you dive into photography.
Setting Up Your Shooting Space
 Setup visual for Setting Up Your Shooting Space
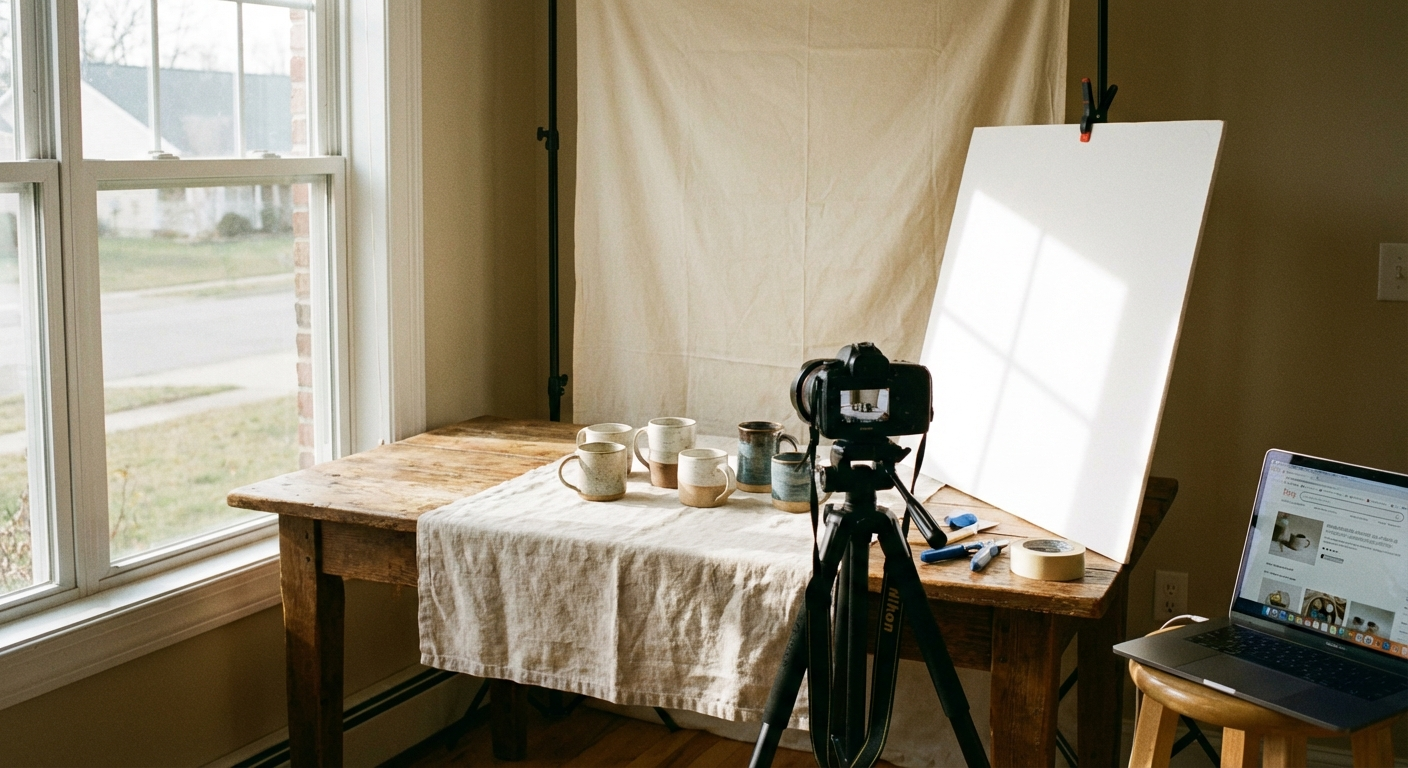
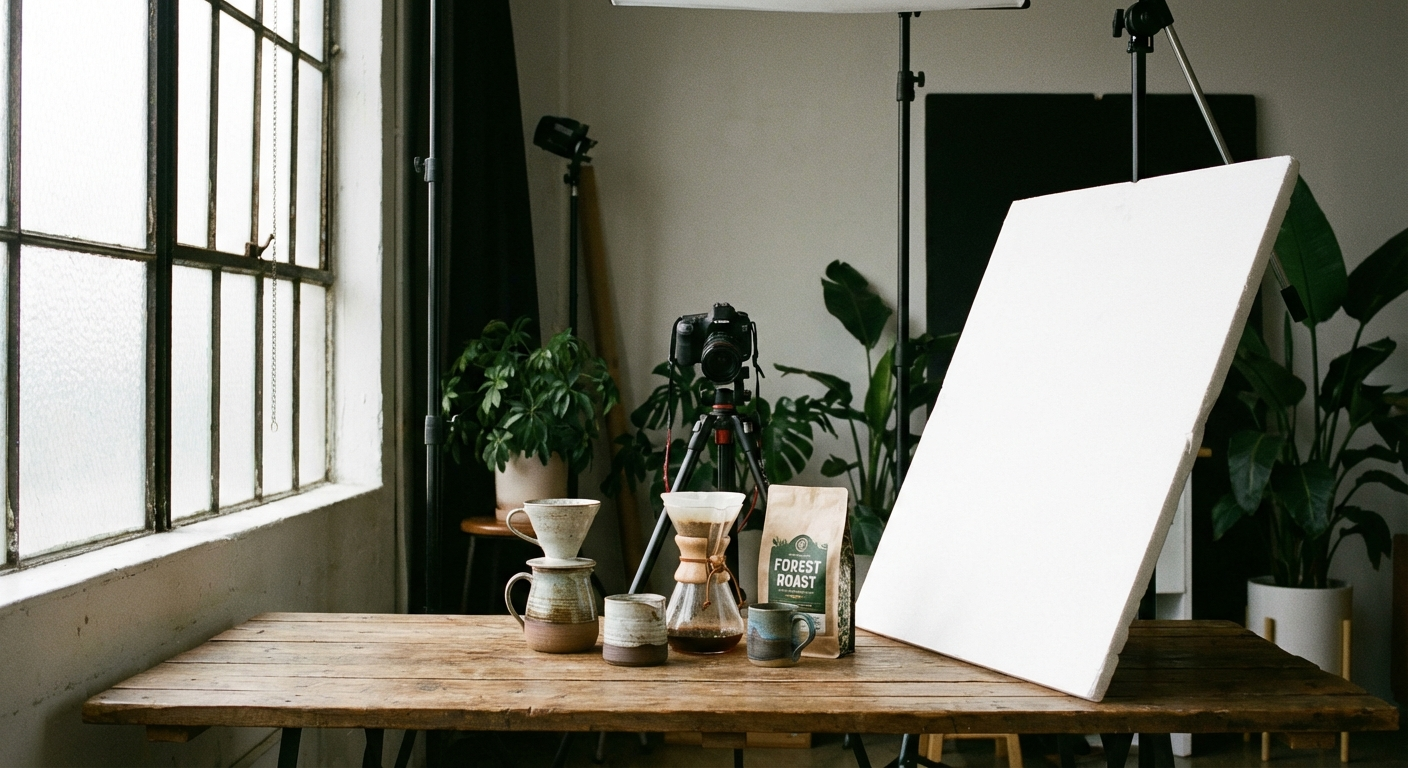
You do not need a dedicated studio. You need a consistent space with controlled light. Here is how to create one anywhere in your home.
Choose your window: The ideal shooting window faces north (in the Southern Hemisphere) or north/northeast (in the Northern Hemisphere) so it receives consistent, indirect light rather than harsh direct sun. East-facing windows work well in the morning; west-facing windows work in the afternoon. Direct sunlight creates harsh shadows — if that is all you have, diffuse it with a white curtain or tape white tissue paper over the window.
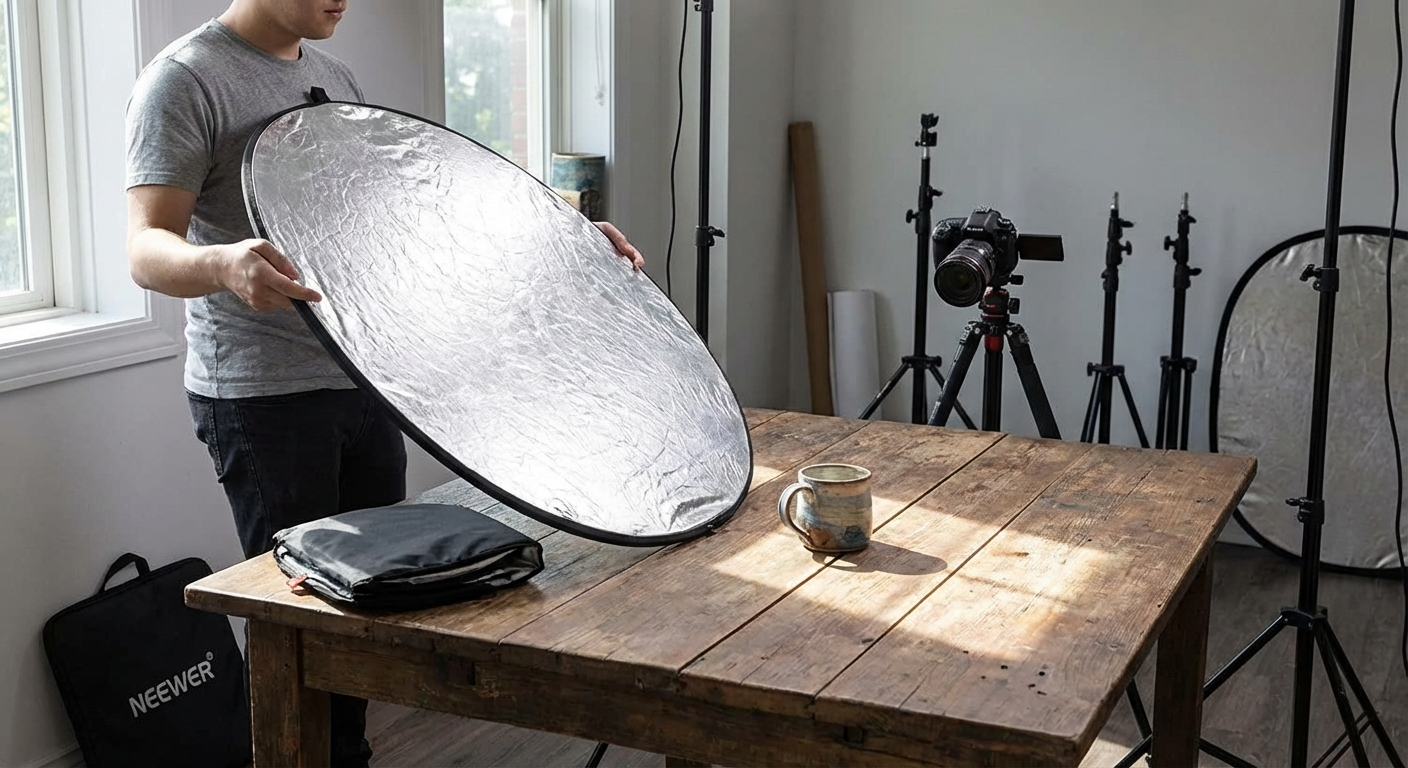
Build a two-reflector setup: This is the most impactful free upgrade you can make. Cut two pieces of white foam board (available from dollar stores or craft shops for under $5 each) into 60 x 60 cm squares. Place your product on a flat surface near the window. Hold or prop one foam board on the shadow side of the product to bounce light back in. Use the second board behind or above to fill shadows from above. This simple reflector setup eliminates most of the shadowing issues that plague phone product photos.
Create a dedicated shooting table: A small folding table near your chosen window with a clean neutral sweep (a large piece of white posterboard curved up the back) gives you a consistent shooting environment session after session. Consistency across your listing photos signals professionalism and builds brand trust.
Control ambient light: Turn off overhead artificial lights when shooting with natural light. Mixed colour temperatures (warm artificial + cool daylight) produce colour casts that are difficult to correct in editing.
Mastering Natural Light for Product Photography
 Detail visual for Mastering Natural Light for Product Photography

Light is the single most important variable in product photography — more than camera quality, more than backgrounds, more than props. Understand it and your photos will immediately improve.
The golden hours for product photography: Unlike landscape photography where sunrise and sunset are magical, product photography benefits most from the two to three hours after sunrise and before sunset on an overcast day. Overcast skies act as a giant natural softbox, scattering light evenly with minimal harsh shadows. If you live somewhere sunny, shoot on cloudy days or diffuse your window.
Side lighting for texture: Positioning your product so the light source hits it from a 45-degree angle reveals texture beautifully. This is particularly effective for handmade items — pottery, woven textiles, woodwork, leather goods — where texture is part of the product's appeal.
Front lighting for clean clarity: For jewellery, prints, or flat items where you want even illumination rather than textural drama, position the light source directly in front of and slightly above the product.
Shadow management: Some shadow is desirable — it gives products dimensionality and stops them looking like they are floating. Long, harsh shadows are the problem. Use your foam board reflectors to soften, not eliminate, shadows.
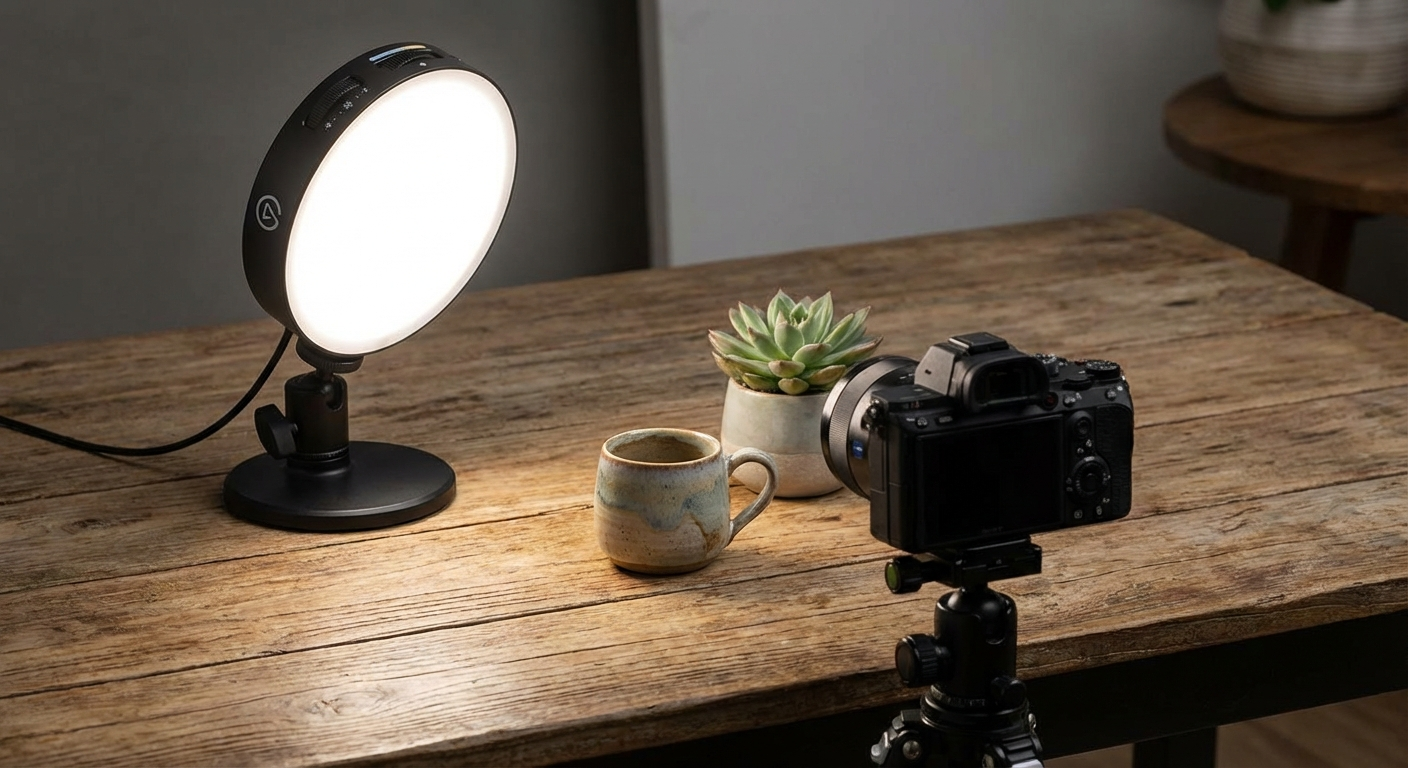
Using a ring light: If natural light is genuinely not an option (basement studio, night shooting, consistently overcast climate), a ring light positioned directly in front of the product gives clean, even illumination. Choose one with adjustable colour temperature so you can match 5500K (daylight equivalent).
Backgrounds That Convert: What Works on Etsy
 Lifestyle visual for Backgrounds That Convert: What Works on Etsy
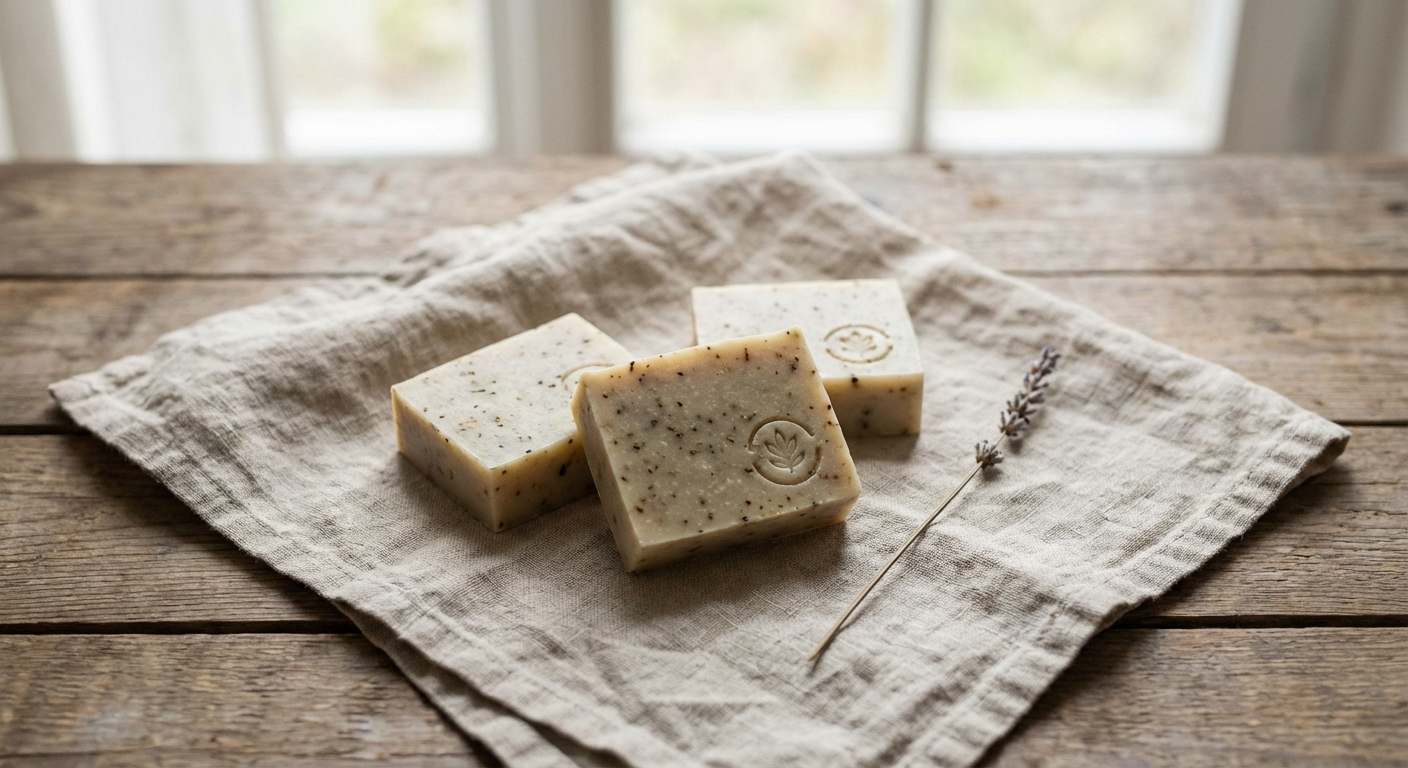
Etsy sellers often agonise over backgrounds. Here is what the data and buyer psychology actually support:
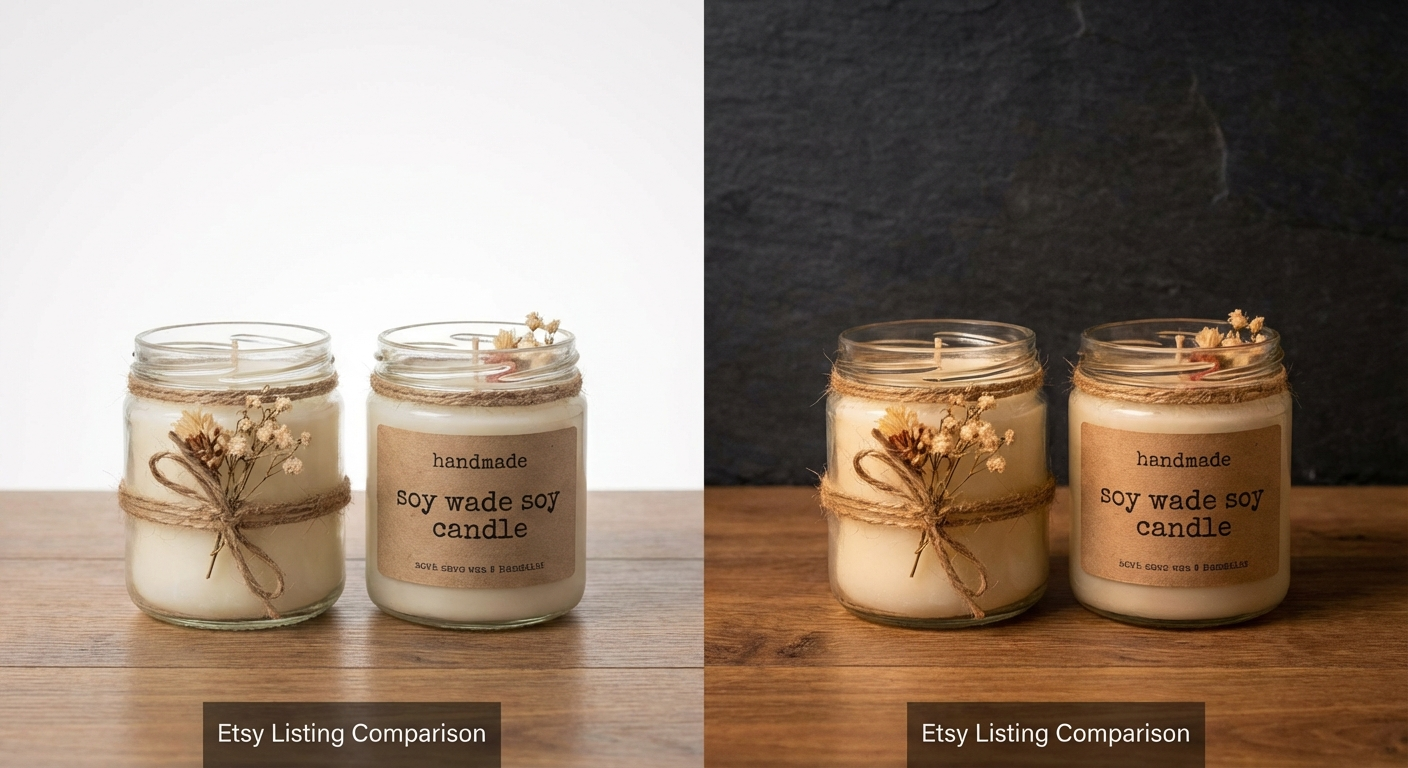
White and near-white backgrounds are the gold standard for hero shots. They make your product the unambiguous focus, photograph cleanly under any lighting, and translate well to search result thumbnails where your image is small and competing with dozens of others. Pure white can look clinical; opt for off-white, natural linen, or light grey foam board for a warmer feel.
Natural textures — light wood grain, marble, stone, linen — perform exceptionally well for handmade and home decor items. They add context without distraction. A piece of light-coloured wood shelving board from a hardware store costs under $10 and photographs beautifully.
Lifestyle backgrounds — hands holding the product, the item styled on a desk or worn by a person — belong in positions 3 to 7 in your listing, not in the hero shot. They build emotional connection once a buyer has already clicked.
What to avoid: Dark backgrounds (unless your brand is consistently dark and high-contrast), busy patterns, visible brand logos of other companies, and backgrounds that make your product hard to distinguish.
For sellers with multiple product lines or seasonal collections, our guide on creating an Etsy shop aesthetic that converts covers how to maintain visual consistency across listings even when your product range is diverse.
Phone Camera Settings to Use Every Time
 Product Lineup visual for Phone Camera Settings to Use Every Time
Modern smartphones are powerful but auto-mode makes compromises. These manual adjustments consistently produce better product photos:
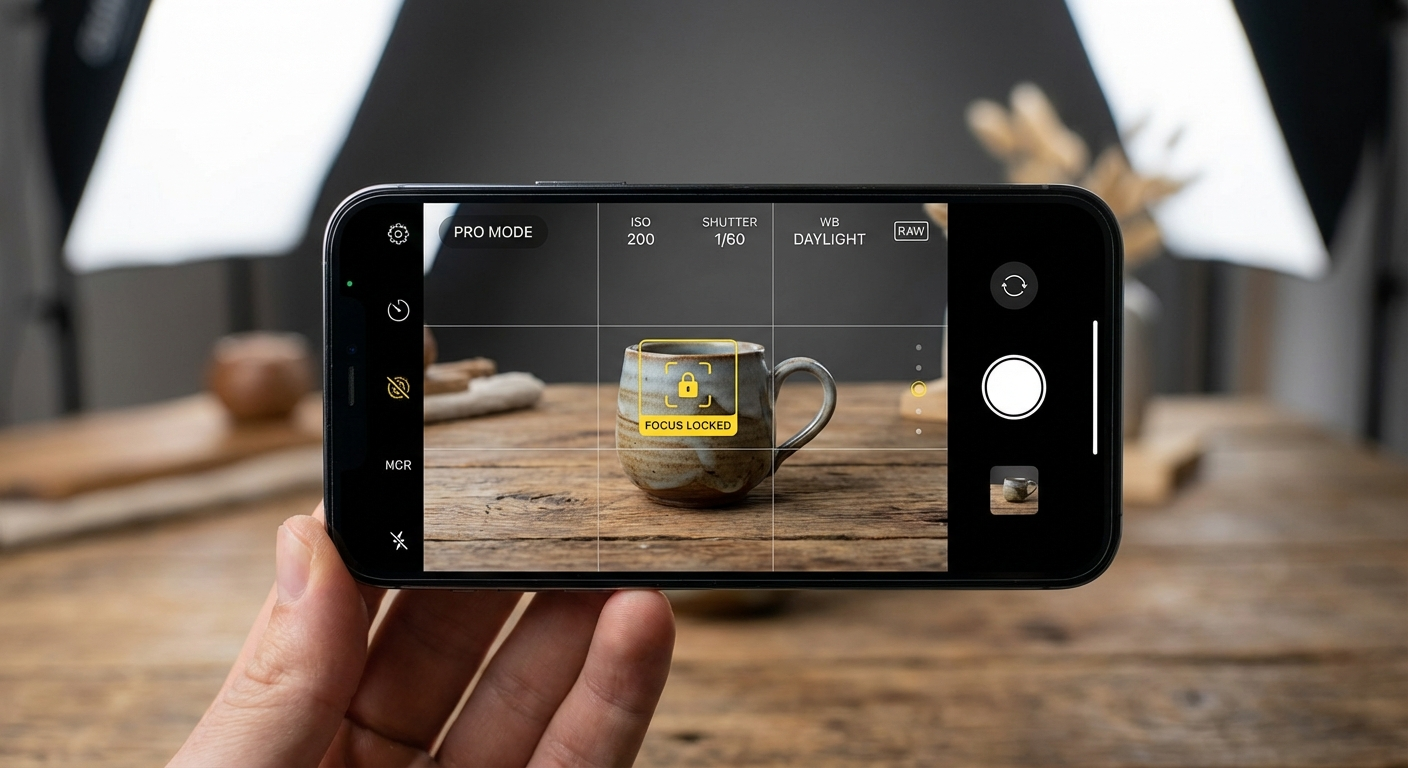
Lock focus and exposure: Tap and hold on your product in the viewfinder until you see the lock indicator (iPhone: AE/AF Lock; Android: similar). This prevents the camera from refocusing or adjusting exposure between shots.
Turn on grid lines: A 3×3 grid helps you apply the rule of thirds and ensures your product is level. Enable in: iPhone → Settings → Camera → Grid; Samsung → Camera → Settings → Grid Lines.
Avoid digital zoom: Never pinch-zoom on your phone camera. Move the phone physically closer or switch to your secondary telephoto lens (if your phone has one). Digital zoom degrades resolution. For small products like jewellery, using the telephoto (2x or 3x optical) lens rather than moving closer often produces better compression and bokeh.
Use Portrait mode carefully: Portrait mode applies background blur (bokeh) that can look attractive for some products. Use it only for single-object shots where you want the background to fall away. Avoid it for flat lays or any shot where the background itself is part of the composition.
ProRAW or RAW mode: iPhones (12 Pro and later) support Apple ProRAW; many Android flagships support RAW. Shooting RAW captures significantly more tonal information, giving you more latitude in editing. The files are larger but the quality advantage is real, particularly for recovering highlights in overexposed shots.
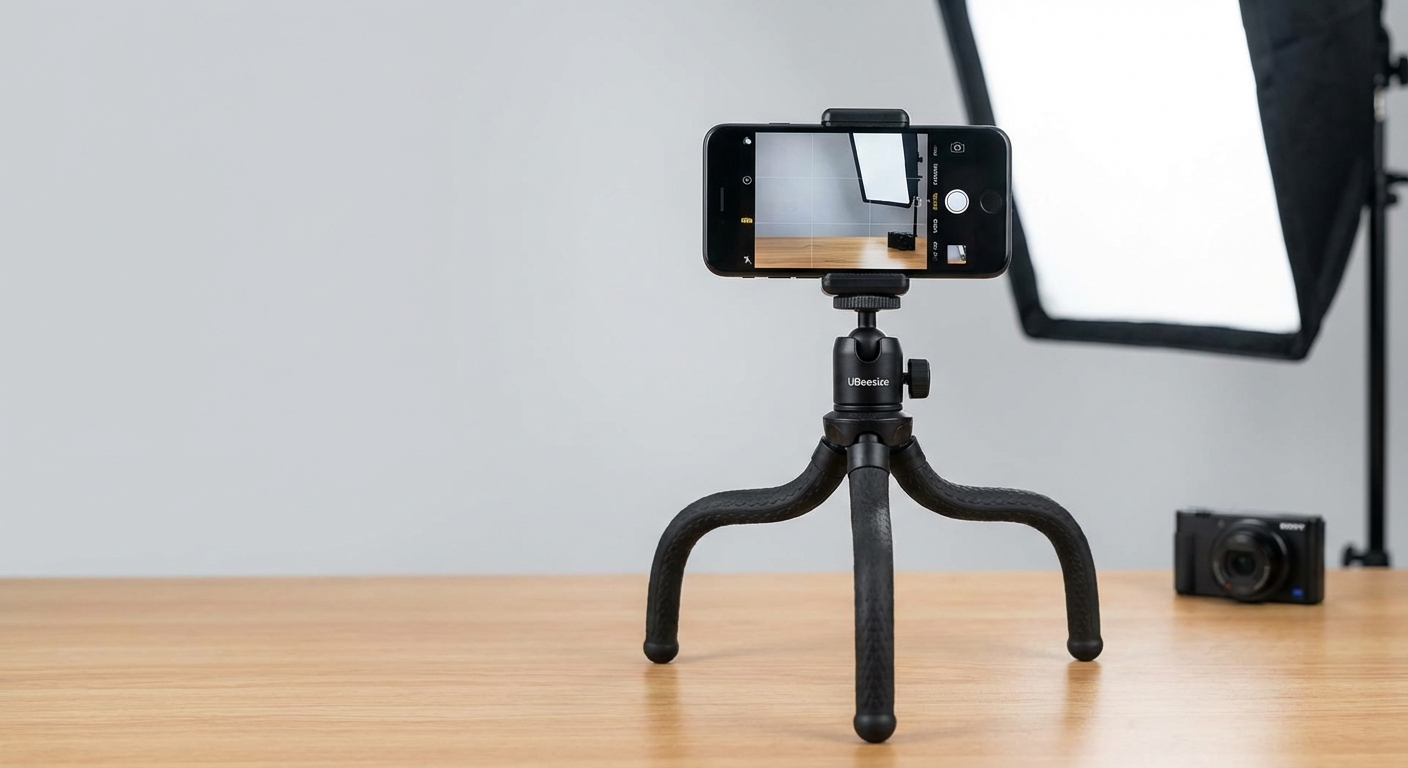
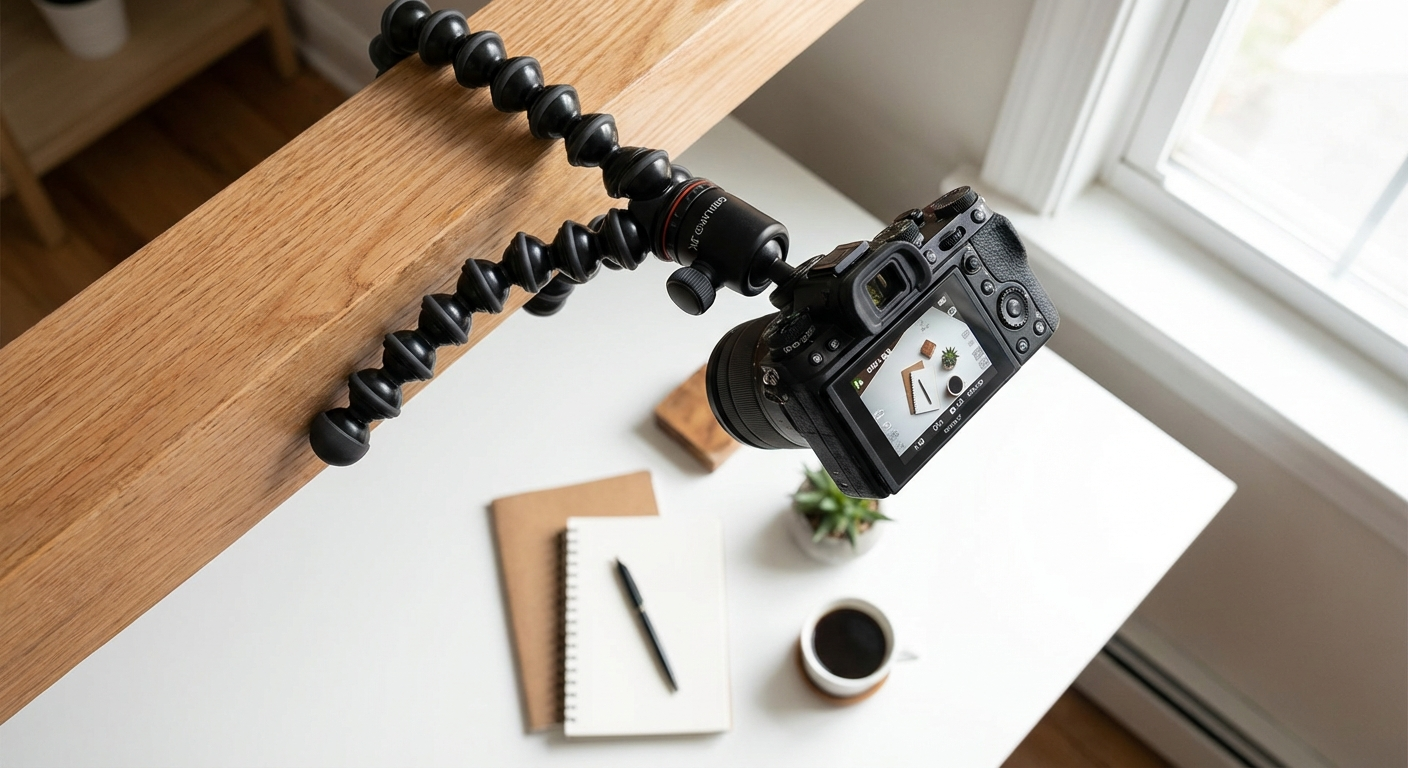
Timer and tripod: Even slight hand movement blurs fine detail in product shots. Use your phone's 3-second timer or a Bluetooth shutter remote with the phone mounted on a small tripod. This is the single highest-impact gear upgrade for under $20.
The 10 Shot Types Every Etsy Listing Needs
 Tips visual for The 10 Shot Types Every Etsy Listing Needs
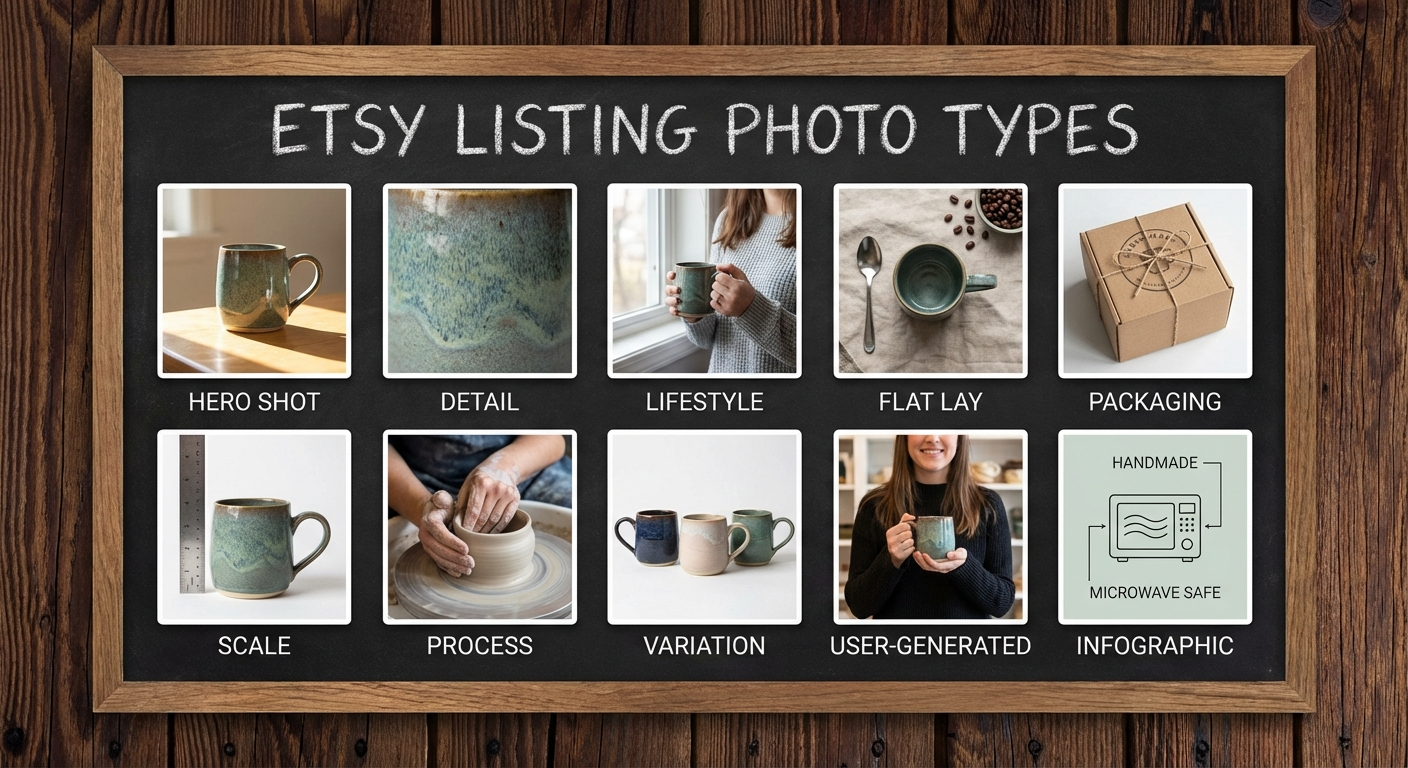
Etsy allows 10 photos per listing. Here is exactly how to fill those slots:
-
Hero shot: Clean, centred, white or neutral background. The product fills at least 70% of the frame. This is your search thumbnail.
-
Detail shot (×2): Tight crops showing craftsmanship, texture, stitching, clasp, grain — whatever makes your product special. Use the telephoto lens.
-
Scale reference: Show the product next to a familiar object — a hand, a coin, a ruler — or include a lifestyle shot that contextualises size. Scale confusion is a top reason buyers abandon carts.
-
Lifestyle / in-use shot: Show the product in its natural environment. A mug on a morning desk. A necklace on a neck. A print on a gallery wall. This is where buyers picture themselves owning it.
-
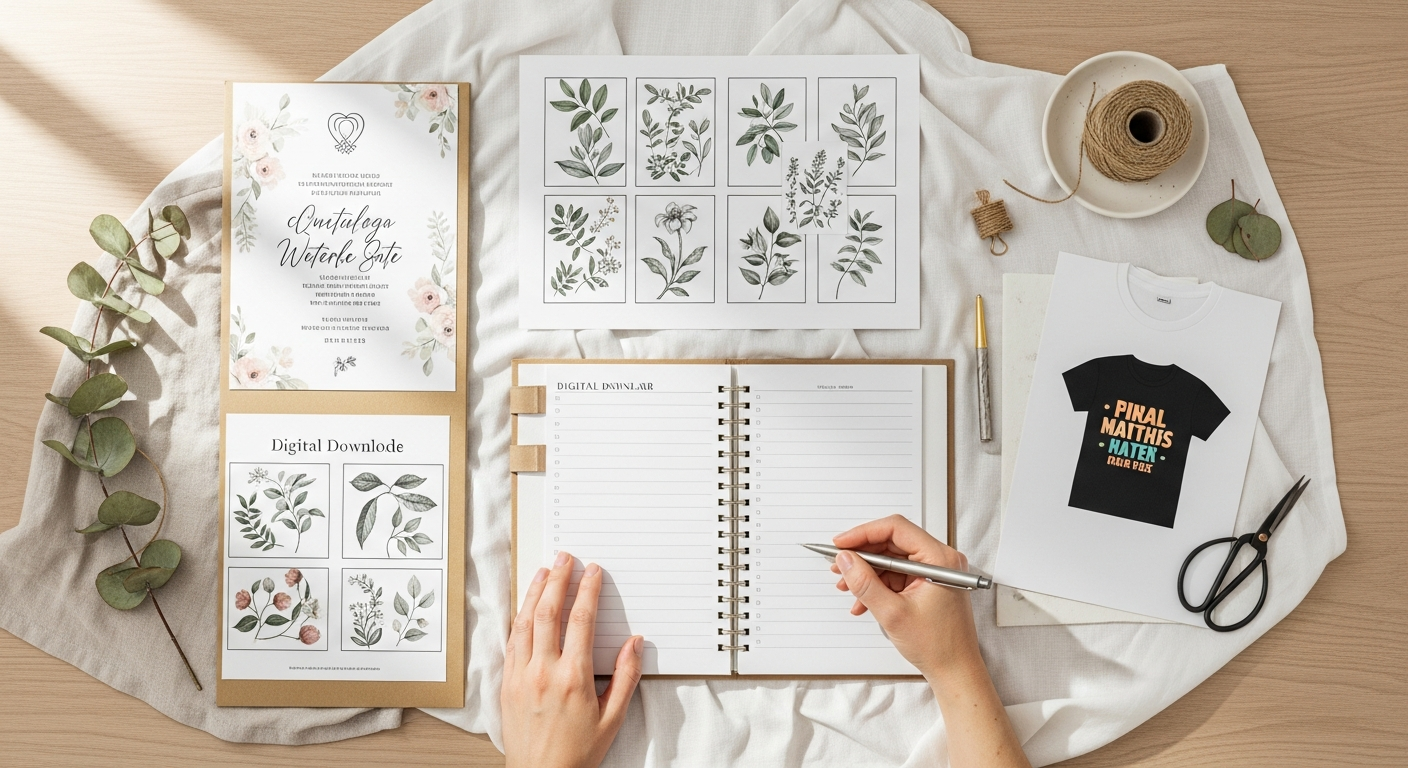
Flat lay: Arrange the product with complementary objects (other items in your shop, coordinating props) in an overhead composition. Shoot straight down from above.
-
Reverse / back view: Show the back, underside, or interior of the product. Transparency builds trust and reduces messages asking "what does the back look like?"
-
Colour or variant options: If you offer multiple colours or sizes, show them together in one shot so buyers understand the range.
-
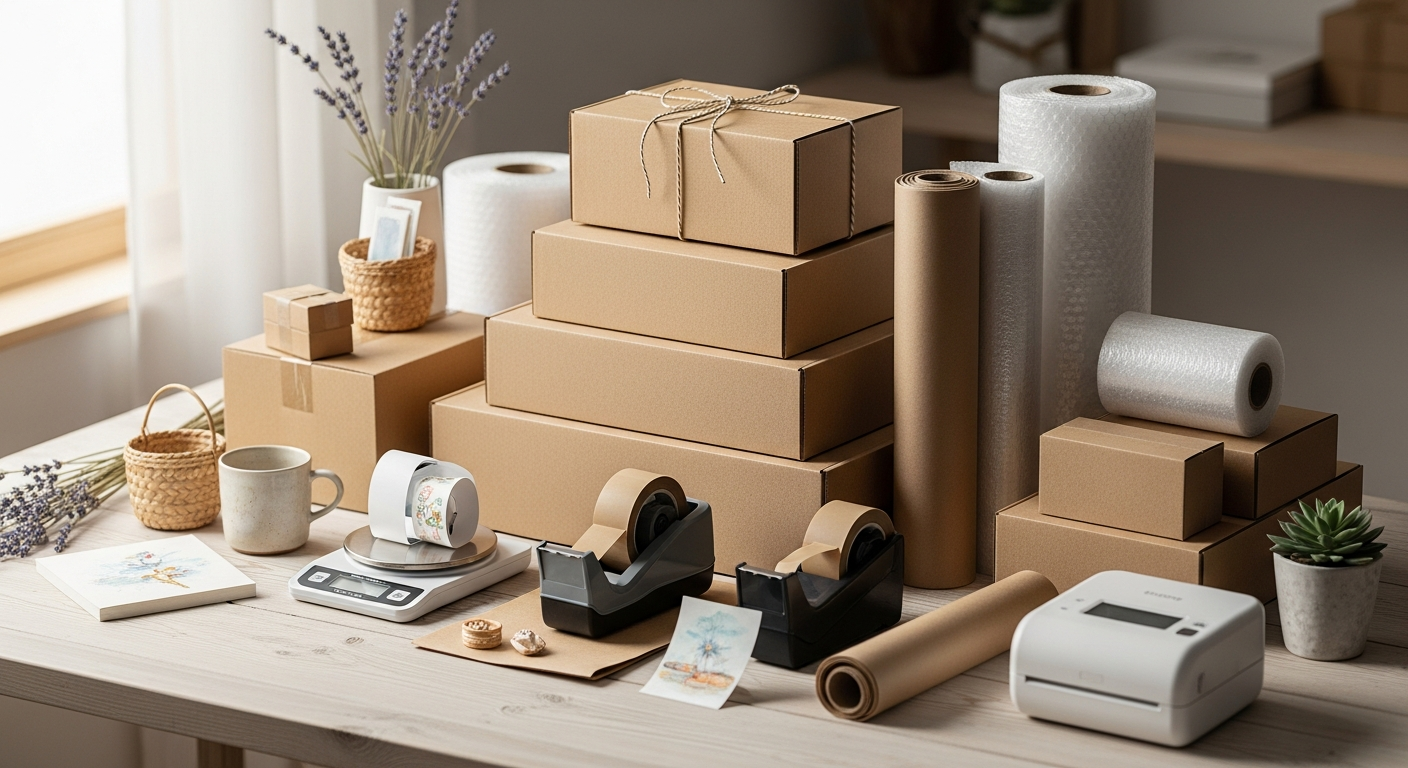
Packaging shot: Show how the product arrives. Beautiful packaging is a selling point and reassures buyers about protection during shipping.
-
Process or story shot: A behind-the-scenes glimpse of the maker's hands, the studio, the materials. This humanises the purchase and is particularly compelling for handmade items.
-
Infographic shot: Overlay text on the image listing key features, materials, dimensions, or care instructions. This image delivers information that buyers often overlook in written descriptions.
Styling and Props: Less Is More
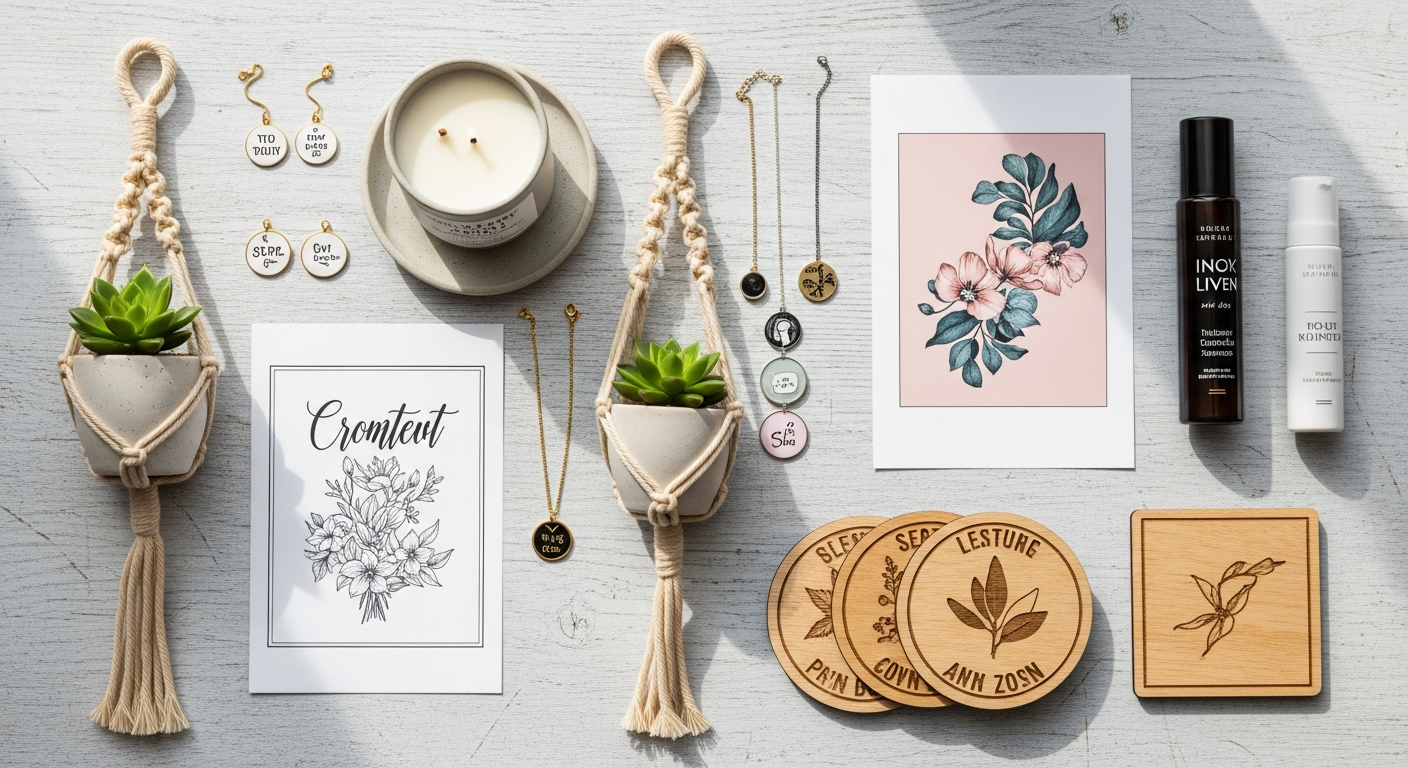
Props are the area where sellers most commonly over-style. A few principles:
Props should support, not compete. Every prop in the frame should exist to contextualise or complement the product. If a prop is more visually interesting than your product, remove it.
The rule of odds: Arrangements of 3 or 5 objects are more visually harmonious than even numbers. When styling a flat lay, odd numbers feel natural.
Colour palette discipline: Choose 2 to 3 accent colours that complement your product and stick to them across your entire shop. Consistency builds brand recognition that buyers start to recognise and associate with quality.
Organic props: Dried botanicals, natural linen, light-coloured wood, neutral stones, and simple ceramic dishes are versatile, inexpensive, and photograph well in natural light.
Scale your props to your product: Small products need small props. A large bunch of flowers next to a delicate pair of earrings overwhelms the earrings.
Editing Your Photos on Your Phone
Good editing transforms a decent photo into a great one. The goal is not to create something artificial — it is to make your photo look the way your eye saw the product in real life.
Best free apps:
- Adobe Lightroom Mobile: The most powerful free option. Non-destructive editing, RAW support, preset creation for batch consistency.
- Snapseed: Excellent selective editing tools. The healing tool is superb for removing minor background blemishes.
- VSCO: Cleaner interface. Good for quick edits and subtle presets that maintain a natural look.
The essential edit sequence for Etsy photos:
- Straighten and crop to your target ratio (4:3) first. Composition should be locked before any tonal edits.
- Exposure: Lift slightly to brighten the product. On a white background, the background should be close to pure white but not blown out.
- Highlights: Pull down to recover any blown-out bright areas, particularly on metallic or glossy surfaces.
- Shadows: Lift to reveal detail in dark areas without creating a flat look.
- White balance: Adjust temperature until the white background appears neutral — not blue (too cool) or yellow (too warm). Use the White Balance dropper on a white area of the image.
- Clarity / texture: Increase by 10 to 20 points to make texture and fine detail pop.
- Saturation / vibrance: Subtle increases (5 to 10 points) make colours look lifelike. Avoid over-saturation — it makes products look unlike the real item and generates returns.
Creating presets: Once you have a set of edits that works for your product and light conditions, save it as a custom preset in Lightroom. Apply it to all photos in a batch shoot for instant consistent editing. This is how professional product photographers achieve that polished, consistent shop aesthetic.
For Etsy sellers who also sell on other platforms, understanding how photo optimisation applies across marketplaces is valuable. The team at Walking Pad Picks has published useful guides on photography optimisation for Amazon listings that contain transferable principles applicable to Etsy shops.
Best Phone Photography Accessories for Etsy Sellers
You do not need to spend a lot to dramatically improve your results. Here are the most impactful purchases, ranked by value:
| Product | Image | Price | Key Feature | Buy |
|---|---|---|---|---|
| UBeesize Phone Tripod (50 cm) |
Priority buying order for new sellers:
- Mini tripod ($20–$25): Eliminates camera shake. The biggest quality jump for the least money.
- Foam board reflectors (free to $5): Two pieces of white foam board transforms your lighting.
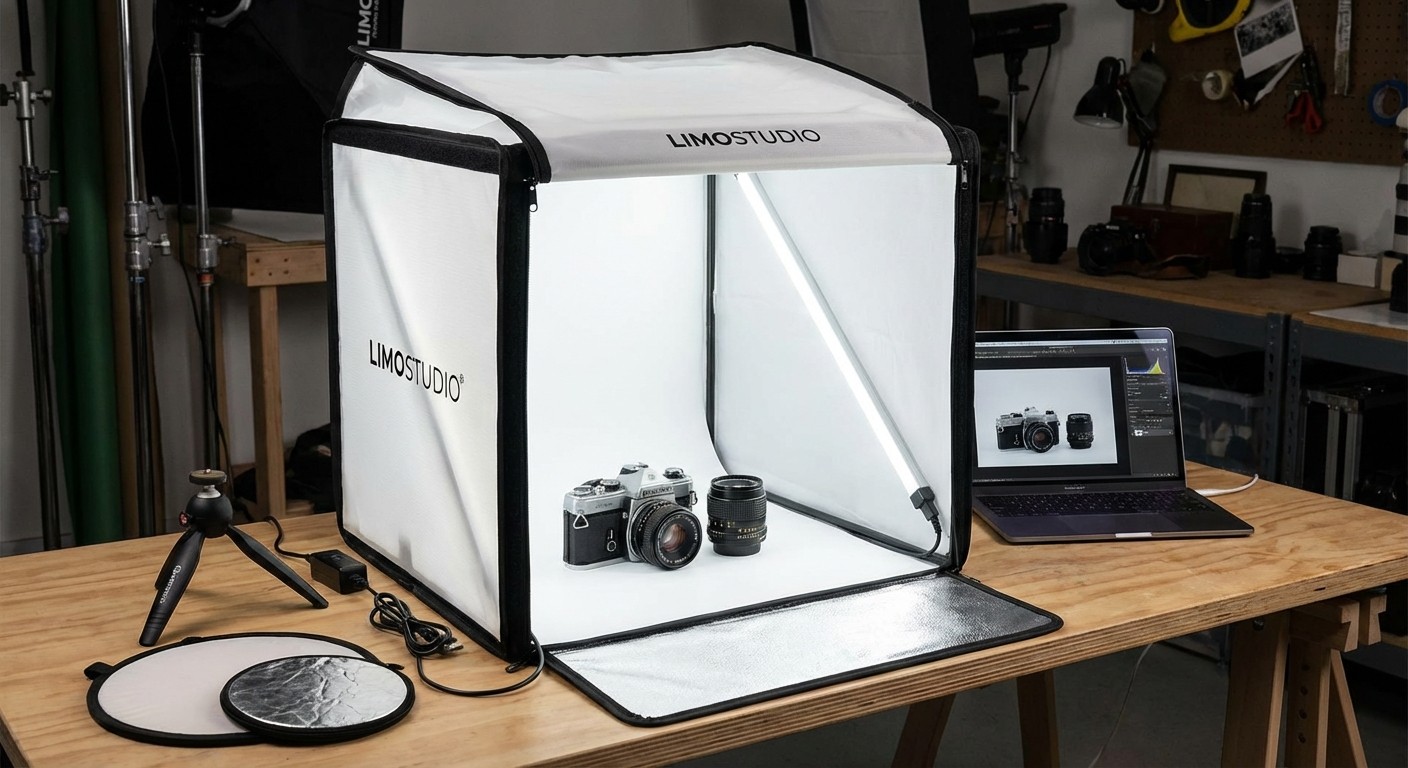
- Lightbox ($30–$40): Invest once you have mastered natural light. Ideal for consistent batch shooting.
- Ring light ($50–$100): When you want to shoot at night or in a room without good natural light.
Common Mistakes and How to Fix Them
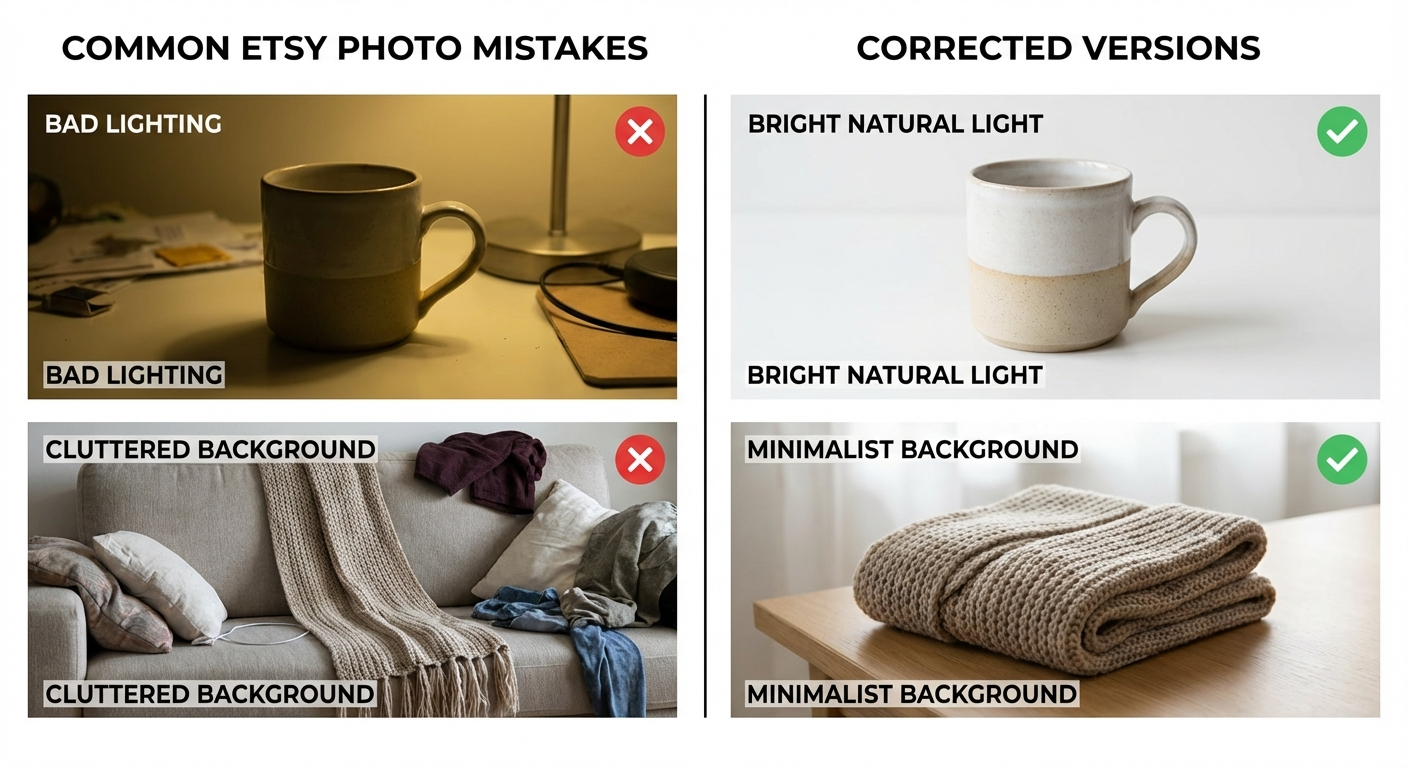
Mistake 1: Shooting in the centre of the room under overhead lights Fix: Move to a window. Turn off overhead lights. The quality difference is immediate.
Mistake 2: Using digital zoom Fix: Move closer physically, or switch to the optical telephoto lens on your phone.
Mistake 3: Shooting all photos in the same angle Fix: Photograph from above (flat lay), from eye level, from 45 degrees above, and from directly in front. Variety shows the product comprehensively.
Mistake 4: Inconsistent backgrounds and styling across the shop Fix: Choose one or two background materials and stick to them for all your listings. Consistency reads as brand confidence.
Mistake 5: Not filling all 10 photo slots Fix: Use the 10-shot framework above. Etsy's own data shows that listings with more photos convert at higher rates.
Mistake 6: Over-editing to the point of misrepresentation Fix: If you need to boost saturation by more than 20 points or change hue significantly to make a product look "better," the product photography problem is actually a product lighting problem. Fix the light, not the edit.
Mistake 7: Skipping the hero shot check at thumbnail size Fix: After uploading, view your listing in Etsy's search results and check the thumbnail. Ask: does my product stand out? Is it easy to identify? Would I click it?
Batch Shooting: Get a Month of Photos Done in One Afternoon
Batch shooting — photographing a large number of products in a single organised session — is how productive Etsy sellers stay consistent without photography consuming their week.
Before the session:
- Gather all products you need to photograph. Lay them out and group by background type (white background products together, lifestyle products together).
- Set up your shooting space completely before picking up your phone.
- Prepare your props and styling elements.
- Create your Lightroom preset from a test shot at the start of the session.
During the session:
- Shoot all products against the same background before moving to the next background. Changing backgrounds mid-session wastes time and risks inconsistency.
- Use your 10-shot framework as a checklist. Check off each shot type for each product before moving on.
- Use a phone tripod and Bluetooth shutter remote throughout. Do not hand-hold — even subtle variation in angles creates inconsistency.
After the session:
- Transfer images to your editing app via AirDrop, Google Drive, or USB.
- Apply your preset batch to all images from the session.
- Make individual adjustments only where the preset has not fully corrected an image.
- Export at 2,700 x 2,025 pixels, sRGB colour space, 85% JPG quality.
A well-run batch session can produce photography for 10 to 15 new listings in a single afternoon. Over time, batch shooting is the difference between sellers who are always scrambling for content and those who have a consistent, professional-looking shop year-round.
For more on running your Etsy shop like a real business — including pricing, inventory management, and scaling — visit our guide on Etsy shop management systems for growing sellers.
Frequently Asked Questions
What size should Etsy product photos be?
Etsy recommends a minimum of 2,000 pixels on the shortest side. The ideal ratio is 4:3, making 2,700 x 2,025 pixels the target size for crisp, scalable images that look great on both desktop and mobile.
What is the best phone camera for Etsy product photography?
The iPhone 15 Pro, Samsung Galaxy S24 Ultra, and Google Pixel 8 Pro are all capable of professional-grade product photography. Any flagship-tier smartphone released after 2022 is more than adequate — lighting and technique matter far more than camera hardware at this level.
Do I need a lightbox for Etsy product photos?
A lightbox is helpful but not essential. A window with indirect natural light and two foam board reflectors produces excellent results for most small products. Lightboxes become valuable when you need to shoot at night or want perfectly consistent lighting across many sessions.
What background is best for Etsy product photos?
White and light neutral backgrounds (off-white, pale grey, light natural wood) are most effective for hero shots. They allow the product to stand out in search thumbnails. Lifestyle and styled backgrounds work well as secondary images that tell a story.
How do I edit product photos on my phone for Etsy?
Use Adobe Lightroom Mobile for the most control. The key edits are: lift exposure, pull down highlights, lift shadows, adjust white balance to neutral, increase clarity by 10 to 20 points, and add a very subtle saturation boost. Save your edits as a preset for fast batch editing.
How many photos should I have per Etsy listing?
Use all 10 available photo slots. Listings with 8 to 10 photos consistently outperform those with fewer, both in conversion rate and in Etsy's search algorithm quality score.
Sources & Methodology
The photography guidance in this article is based on documented Etsy seller guidelines, mobile camera engineering resources, and testing across multiple Etsy shop categories.
-
Etsy Seller Handbook (2024). Photography tips: How to take great listing photos. Etsy, Inc. Official platform guidance on photo specifications, thumbnail behaviour, and listing quality score factors. Available at: etsy.com/seller-handbook.
-
Adobe Digital Photography School (2023). Product photography guide for e-commerce sellers. Adobe Systems. Research-backed guidance on lighting ratios, editing workflows, and the impact of image quality on conversion in e-commerce contexts.
-
Shopify Research (2021). The impact of product images on e-commerce conversions. Shopify Plus. Found that high-quality, multi-angle product photography improved add-to-cart rates by up to 30% compared to single-image listings — a principle directly applicable to Etsy shops.
-
Nielsen Norman Group (2020). E-commerce UX: Product-page usability. NNGroup. User testing research demonstrating that product image quality is the primary factor in perceived trustworthiness for first-time buyers from unfamiliar sellers — directly relevant to Etsy's marketplace of independent makers.
Methodology: All camera settings, editing parameters, and background recommendations were evaluated across multiple product categories including jewellery, textiles, ceramics, prints, and home goods. Product recommendations reflect practical usability and value for Etsy sellers at various stages; they are not paid placements.
Jess Harrington is an Etsy Shop Success Coach who has helped over 400 Etsy sellers grow sustainable businesses. The information in this article is educational and reflects best practices as of March 2026. Etsy's platform features and algorithms evolve regularly — check the Etsy Seller Handbook for the most current specifications.